Metal detector DIY
Metal detecting tips and tricks are essential skills that are picked up over the years that can have a positive impact on a typical detecting day.
Tips, tricks and hacks can increase your finds rate, reduce the amount of time needed to extract a find and contribute to making your day easier.
Over the years, I have developed many little tips, tricks and hacks to make my life easier during a detecting day, usually out of necessity. Tips for metal detecting definately can help you out!
These include speeding up the process of identifying and locating a target, extracting the target, protecting yourself, protecting your equipment, cleaning finds in the field and just generally making the process more efficient.
I have collated several metal detecting tips and tricks that I use which I hope will stand you in good stead in the future. I am hoping to keep adding to this article as these hacks arise so keep checking back into the website in the future!
Maybe a good place to start would be to read my article on metal detector settings and what they do first here!
Tips for metal detecting
Metal detecting tips and tricks
Tip 1

Over the years, I have known many metal detecting colleagues that have either temporarily or permanently lost their their probes or pinpointers.
This can be one of the easiest things to do as you get lost in the moment of retrieving a target.
You find the target in the side wall of your hole, you put your pinpointer on the ground next to you, you glory in the great find you have refilling your hole and subsequently leaving your prized pinpointer behind you.
Sometimes people don’t even notice they have left it behind and find it impossible to trace their footsteps later.
Well, I have never lost a pinpointer to date and even though my method may look a bit ramshackle to many, it definitely does the trick.
As you can see from the attached photo of my Garrett Pro Pointer, I have used a black cable tie provide the loop attachment which has been tightly secured with black electrical tape.
(Some newer pinpointers now come with a built in loop attachment)
The black electrical tape is a really handy item to have about you. Probably not worthy as a full top tip in this article but always handy to have in your utility pack for running repairs in the field!
You can read my article on metal detecting pinpointers here!
I have then used a heavy duty retractable lanyard which loops onto my belt with an additional carabiner. The extension length of the metal wire is ample enough for me to find a target in a hole at the full stretch of my arm.
Being attached means that I never leave it behind! You can find these retractable lanyards on Amazon here.
One more belt and braces trick is to place a key tag label on it with your contact details on. A responsible an honest detectorist finding it will get in contact with you. I have known this to happen which is comforting.
You may be interested in my further pinpointer hack on my Garrett Pro Pointer to increase its depth up to 50%. You can see my video of it here!
Tip 2

My second tip here has personally absolutely saved my legs and knees over the years!
A day out detecting can, to contrary opinion be quite intense and place a lot of stress on your joints.
This obviously stems from the constant crouching and kneeling if you’re lucky enough to be having a great day retrieving lots of targets!
I’m in my 50’s now and these knee supports are the only way I can make it through a full day detecting.
They are designed to give sports people extra support but they also fit the bill with enthusiastic metal detectorists also.
The attached photo is of mine that I purchased some time ago. They are a great investment and will last you a long time. They are very stretchy and provide really tight support above and below my knee which is great.
You can find something very similar over on Amazon here.
Tip 3
Okay, tip number three. Hopefully you can see from the photo, this is my belt pack with finds pouches and my utility pack. It’s the utility pack that I wanted to put forward as my top tip number three.
Having a good sized utility pack that sits on the back of your belt is one of the most useful items if you don’t want to lug around a backpack.

In my utility pack, I have enough room for liquids to allow me to rehydrate, especially important in summer and food or snacks to keep me going.
The spare capacity I have filled with what I think are essential items if you are detecting over several fields and it would be a pain to go back to your vehicle.
Typical items I have as you can see are a small First Aid kit with a resuscitation face shield, the black electrical tape as mentioned, glucose energy tablets and spare batteries.
Other items include spare small cable ties, a spare coil bolt in case one breaks, a spare pair of earbud headphones in case my bluetooth ones fail amongst more like antibacterial hand wash.
The beauty is that you can tailor make your utility pack for you. The type I have are called “Molle” pouches and tactical packs which are armed forces quality.
You can find Molle pouches here and a tactical packs here over on Amazon. Don’t forget, you may need a belt here.
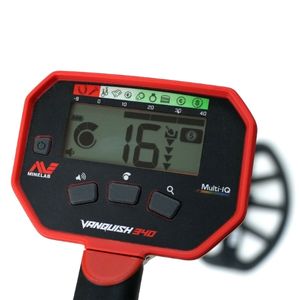
Unbeatable Multi Frequency!
You can now get the ultimate power of multi frequency technology over single frequency detectors with the Minelab Vanquish range of detectors.
The entry level Vanquish 340 now gives you ultimate depth, stability and sensitivity on all target types in every soil, including wet beach sand.
Tip 4

For tip four, I have combined two items as they most often get used together when I’m out detecting.
I know this may be simple but the best solutions often are.
I have lost count the amount of times I’ve been out and come across detectorists removing a finds from holes not having any kit to gently clean them.
Instead, without even knowing what a find is or its significance, they rub off the earth with gloves on and then rub it on their clothing possibly scratching it to pieces!
My tip here is to be armed with simple kit like a small bottle, a small travel toothbrush and what most people forget, a small old soft towel.

The towel I have is from my old army towel I had which I cut into much smaller pieces.
I drape it over and inside my belt so I know where it is and it’s readily available.
The bottle and travel toothbrush in all honesty I’ve forgotten where I got that from! I’ve had them for so long.
I think it may of been and old medicine tablet bottle as I have to press it down to open it!
If a find is quite dirty, I reach for the bottle which I keep located handy in the side net pocket of my front Molle pouch I use for collecting junk finds.
It’s just filled with clean water every time I go out with a squirt of washing up liquid.
The mild detergent will remove the mud a little more without harming the find. I’ve simply used the black insulation tape again to fix the travel brush to the side of the bottle. (I told you the insulation tape was handy!)
I simply dip the brush into the detergent mixed water, gently clean the find to help identify it and then gently pat it dry in the soft towel.
You’ll be amazed who you’ll meet who won’t have this and ask to borrow yours! You can get the little typical travel toothbrush on Amazon here.
Tip 5

My next tip is a cracker but then I’m a bit biased! It’s more of a metal detecting hack than a tip really but I love it.
I love it because it keeps my expensive piece of kit off the ground and keeps it close to me.
It’s also very useful in the fact that it totally free’s up my hands to do other things.
This could be when I’m crouching or kneeling and I need to have my digging tool in one hand and my pinpointer in the other perhaps.
I can instantly let go of my Equinox 800 and it will hang confidently by my side. You can read my article on metal detecting digging tools here.

The beauty of this metal detecting hack is that I have made it with a stretchy tubing that you would typically find on exercise equipment.
In fact, that is what I butchered it from. That, along with some small black cable ties and the end of a dog lead.
The part on my Equinox 800 handle is attached by a velcro strap and hook attachment.

As I said, when attached, it means you can let go of your detector at any stage, kneeling, crouching or standing to dig with both hands and your machine won’t have to touch the ground.
Perfect for when you have to check the hole again and again as you don’t have to keep picking it up!
It stretches as you swing and sweep ready for being let go of whenever you need to.
I have placed a handy metal link in between mine purely because it took a couple of attempts to get the stretchy cord length perfect…..why not give it go? You can find bungee cord here, velcro straps here, ring attachments here.
Tip 6

Tip number six is to get yourself one or two great little finds boxes. You never know when you’re out metal detecting if you’ll find some really nice finds amongst the mediocre everyday ones.
You’ll obviously want to keep these safe and protected against further damage in the field.
If these finds were placed in amongst everything else, they’d be tumbling around potentially sustaining further scratches and damage. A tidy finds find box will prevent this.
Another top tip is to always keep your eye out for any thin foam within everyday packaging.
The small finds box of mine in the photo didn’t come with the foam inserts. I actually salvaged that from some packaging and cut it perfectly into shape.
This adds to the protection and stops any finds from rattling around within the individual compartments!
To be fair, these boxes are the same as the boxes you’ll find anglers using for hooks and things.
You can find some great metal detecting finds boxes over on Amazon here.
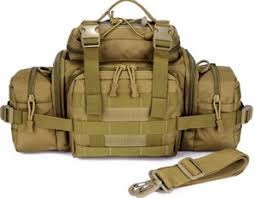
Ultimate Tactical Packs!
Carry everything you’ll need for a detecting day like a First Aid kit, detector spares, finds boxes, batteries, snacks and drinks to rehydrate.
Never forget anything again with a belt pack!
Tip 7

This is a really important one. For tip seven, I want to recommend that you get a good pair of knee pads.
The knee supports we discussed earlier are different.
They will provide the additional support you need throughout the day saving the wear and tear on your joints.
The knee pads will prevent you from getting too wet and also getting covered in mud.
They will also prevent any injuries to your knees from any stones in the ground.
They really are an essential piece of kit in my mind that will keep you detecting for longer as you’ll be more comfortable throughout the day.
The knee pads in the photo are mine and they are gel filled which makes them super comfortable for me. You have plenty to choose from and you can find some great knee pads over on Amazon here.
Tip 8

For tip 8, another essential piece of kit are gloves. Again, it may seem simple but is very often overlooked.
There are a number of reasons why it’s essential to wear gloves. There are a lot of nasty things that lurk in soil that can’t be seen with the naked eye.
If these get into your system, it could seriously ruin your day….or even several days!
Gloves will also prevent you getting cuts allowing these bacterial nasties to enter your system. I never go out without gloves.
Much of the trash you’ll dig will have sharp edges. You must protect yourself. I have a further article on metal detecting gloves, types and the reasons to get some here.
Tip 9

Metal detecting days out can last last several hours, especially if you or others are finding some great stuff.
You will not want to leave a field that is producing because your boots are causing you to suffer.
A great pair of boots is essential so my top tip number nine is to invest in some good quality boots.
The main criteria to include here are that they are super comfortable, waterproof, durable, metal free and provide good ankle support for uneven, rough terrain like roughly ploughed soil.
You can read my dedicated article on choosing the best metal detecting boots here.
Tip 10
Choosing the correct clothing is essential for a good metal detecting day out. Choosing the right kit can keep you dry all day, let your body breathe and not overheat and also hold all the essential sundries you may need.
You can further read my article on choosing the correct metal detecting clothing here.
Metal detecting in the rain or even after it has rained saturates the ground and can give a metal detector a great boost in depth. I have an article on metal detecting in the rain here.
Tip 11
If you struggle with the weight of your detector, especially swinging it all day, think about looking into a harness. These can really help by spreading the weight of your machine across your body.
I have a great article that delves a bit deeper into metal detecting harnesses here.
Metal detector DIY – Final thoughts on top tips
I have chosen eight top tips for metal detecting that have stood me in good stead for a long time. I hope to keep this article live and continue to add more top tips to it.
You can read more in my article on metal detecting techniques here.
As well as it consisting of equipment, I also to intend it to be about top tips and hacks using your detector in the field so stay tuned!
Stay safe and happy hunting!
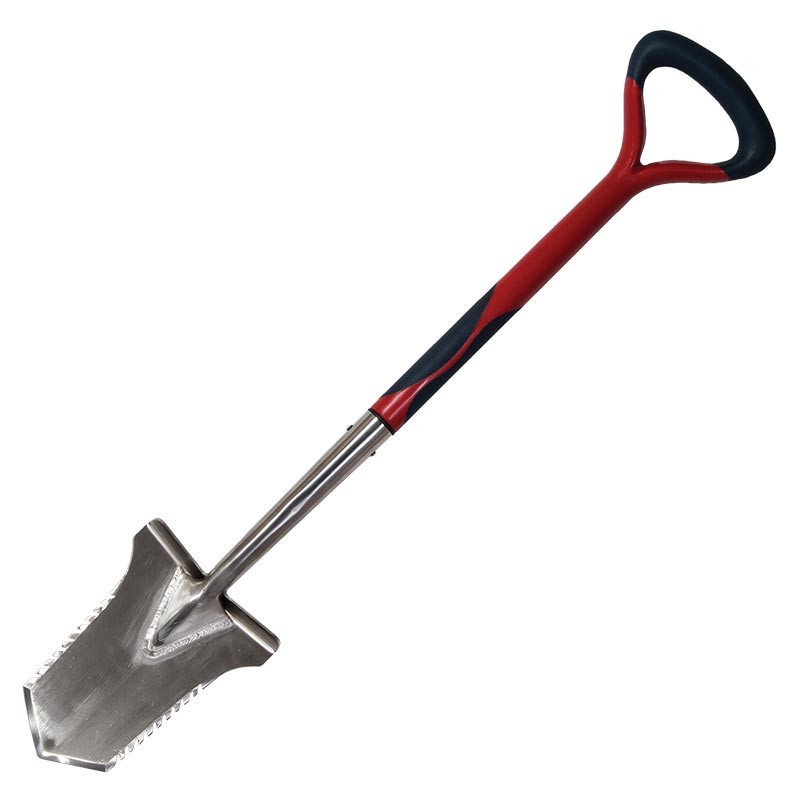
The Evolution Pro Cut
The ultimate accessary for the serious metal detectorist. Super strong, stainless steel specially designed spade.