How to identify iron with your metal detector
Digging multitudes of iron when you first start out metal detecting can be so frustrating that it could potentially put you off the hobby entirley.
This is just as relevant to entry level detectors as to high end detectors. I’ll let you into a secret here! Even people with expensive machines still dig iron if they are not skilled in identifying it.
I’ll reveal another secret….no metal detector is immune or perfect at identifying iron 100% of the time! If you adjust settings to reject iron more aggressively, this can have detrimental effects on performance.
There is a fine balance between how much rejection you wish to employ whilst keeping the highest level of performance. By performance, I mean detection depth and target separation/masking.
What do I mean by this? Well, detection depth of a target is quite straight forward but what is target separation or masking?
Briefly, with too much iron discrimination or rejection, a detectors recovery could be comprimised. A good target that lies inbetween iron could be undetectable with too much iron rejection.
I admit, with the newer most recent detectors, this isn’t as much of problem as processing speeds have increased massively. It must always be a consideration however.
Iron volume must also be a consideration. Rejecting iron by simply not hearing it can be dangerous in respect of potentially missing targets and also digging it due to certain traits of iron.
Read my article on what to do if you unearth something dangerous!
Why does iron sometimes give a good signal?
The reason many of us dig iron is because, strangely enough, when iron is large enough or of a certain shape, it over powers the detector itself and it’s ability to fully reject it lessens.
Iron also can give us a non-ferrous signature as well as a ferrous signature depending on its size and shape as mentioned. This can be found a lot when using multi frequency detectors.
Just to add to the problems detectorist encounter, very often, smaller iron can present as much larger iron!….what do I mean?
Well, as iron ages and decomposes, the iron oxide (rust) leaches into the soil surrounding the iron. This causes the much talked about “halo” effect and makes a smaller target present as a much larger one.

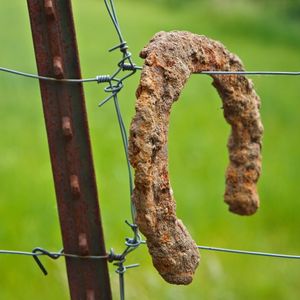
When iron is of a circular or elongated shape, it’s also extremely difficult to determine.
Eddy currents produced by an electromagnetic field give it a perfect signature.
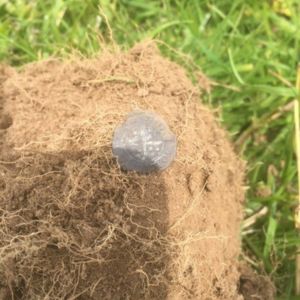
When circular iron is broken, it can be marginally easier to determine. Typical examples are horse or ox shoes.
So why does iron give us a good signal? Well, when you swing a search coil directly over your iron target, it gives it the opportunity to present it’s largest signature to the most receptive part of the coil.
The non-ferrous traits will overpower the ferrous traits and present as a good target. Some detectors have a setting which can limit this but it has ramifications and is a performance trade off.
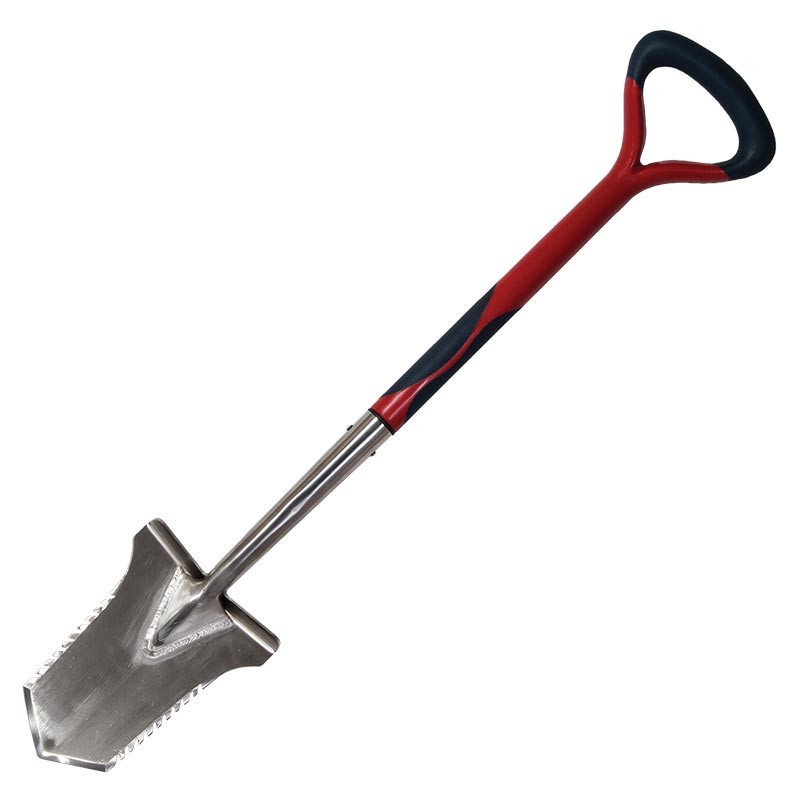
The Evolution Pro Cut
The ultimate accessary for the serious metal detectorist. Super strong, stainless steel specially designed spade.
Typically on my Minelab Equinox 800 for example, this feature is called “Iron Bias”. This can alter how the non-ferrous and ferrous signatures present to you.
The Iron Bias setting adjusts the importance to your choice depending if you want to hear more iron tones than the natural tones of both signatures.
Iron Bias is available on newer machines in various guises but essentially does the same thing. Minelabs newest machine, the Minelab Manticore has replaced iron bias with “upper” and “lower” limits.
The upper limit is an iron bias on smaller irregular iron and the lower limit is a bias on flatter sections of iron. Altering these Bias settings either give you more high tones or more grunts.
How can we limit the iron we dig?
Okay, let’s recap on what we’ve discussed so far and then we’ll discuss some tips and tricks on how to help identify iron. I have written this article on how I do this with my Minelab Equinox 800.
This by no means indicates that these tips and tricks cannot be done on other machines because they can.
At first, trial these tips and dig everything to get used to what your detector is telling you! Test that the technique works with your machine.
It’s a well known fact that due to a combination of its composition and shape, iron can sometimes give you ferrous AND non-ferrous signals.
This is well known in the detecting community. Typically when in a two tone audio mode, a high and low tone will be given.
This is compounded when iron increases in size and it has an irregular, elongated or circular shape. It also can give a strong non-ferrous response when directly under the coil.
The trick here is to reduce the intensity of the non-ferrous signature so you can detect the ferrous signature of the iron.

The Minelab Equinox 800
The ultimate and original multi frequency machine that has opened up a whole new world in detecting technology.
Deep detection and constant stable target identification.
Target search coil tipping
For this to work, I know it’s hard but you have to search in All metal mode so you can hear all of the iron in ground. Hopefully, like my Equinox 800, you’ll have an iron volume so you can lower the impact.
I typically hunt in all metal mode, 2 tones and determine iron with a “tone break” which gives me a low tone for ferrous and a high tone for non-ferrous. (Ferrous are the minus numbers on the Equinox)
I have also turned down the volume of the iron tone so I can just hear it. This avoids me going mental on my busier permissions and also makes the high tones pop out as they are set at a higher volume.
It also works best if you have a DD type coil. I have a useful article on metal detector coil types here.

When you are happily swinging and stop to investigate further what presents as a good target signal, spend a few seconds like this!
With the target directly under the centre of the search coil, centre the target with a “wiggle”, just like the picture shows here.
Now, keeping the target central, wiggle the search coil backwards until the target is under the front tip of your coil.

Wiggling it back a tiny amount more would cause the target to disappear.
Has the tone changed?…..have you gone from a high tone to a low tone or an iron “buzz” or “grunt”?
Now wiggle the search coil forwards so you get the high tone under the centre of the coil again.

Keep wiggling forwards until the target is under the back tip of the coil.
Again, have you gone from a high tone to a low tone “buzz” or “grunt”?
If so, this is looking like iron to me!
Repeat the process at right angles and see what you tones you get. If you get the same results, that would tell me that it’s iron.
(If in any doubt, dig it and see but remember the sounds for next time)
The process of wiggling the search coil forwards and backwards keeping the target under the central blade of the coil also helps you determine the size of the target with a little practice.
Where you transition from a novice detectorist into a seasoned detectorist is when you can determine if a good target is located amongst iron!!
This really is a culmination of carefully listening to your machine and what it’s telling you. Is the iron buzz far enough away from the high tone to make you think it’s a good target near iron?
Are you getting a stable target ID?….are the target ID’s fluctuating but you can see that your machine is trying to give you the same number inbetween the fluctuations?….that’s when you become a Black Belt!

Ultimate Tactical Packs!
Carry everything you’ll need for a detecting day like a First Aid kit, detector spares, finds boxes, batteries, snacks and drinks to rehydrate.
Never forget anything again with a belt pack!
The Minelab Equinox 10 kHz trick
This trick is not exclusive to the Minelab Equinox as many multi frequency detectors can be switched from their multi frequency modes and toggle through their single frequency options.
One of the best features of the Minelab Equinox however is the ease you can do this as it has a dedicated button on the control box just for this purpose.
Let’s take it that you have already undertaken the first part of the process as described above and we are fairly sure it’s iron at this point.
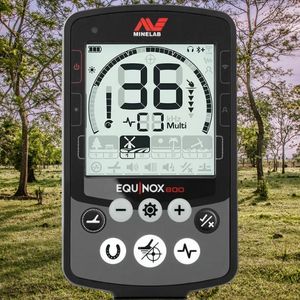
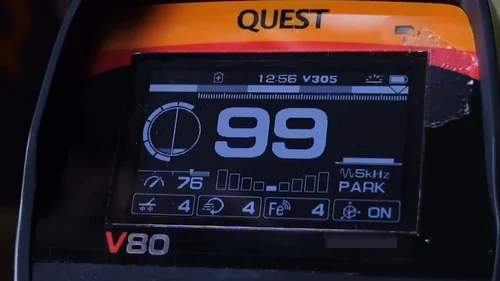
Typically with the Minelab Equinox, I’ve found that if iron is falsing (giving a non-ferrous sound), the target ID usually is around 13-17 on the screen.
I mainly limit my checking process to these VDI’s. Wiggle the coil over the centre of the target which gives you a high tone or non-ferrous signal.
Take a note of the VDI number. It may fluctuate a tiny amount but you’ll see similar numbers repeat.
Now, toggle the Equinox into its 10 kHz single frequency mode and wiggle the coil over the target again. The absolute tell tale sign for iron is if the numbers jump into the mid to high 20’s.
I have a great example of me using this technique in Video #7 in the video vault here!
This is a sure way to tell iron and quite specific to the Minelab Equinox. This function button has been removed from the Manticore so is more of a faff to find and change frequencies.
I have a useful article on the Minelab Equinox 600 and 800 here. These are my top tips for identifying iron.
Identifying trash can be done in a similar way. Searching in multi frequency mode gives you the best opportunity to initially discover a potential target.
Again, on the Minelab Equinox, I really limit my checking to VDI numbers between +1 and 17. (Depending how I feel…!) Anything above this which is stable and sounds good I dig.
Once I have my target under my search coil, I’ve checked around it and there’s no iron, I then check it in 5KHz mode and then in 10KHz mode. If the numbers stay the same as in multi, it gets dug!
If they fluctuate or go much higher, in my experience, it trash. Again, if in doubt, always dig it but it’s good practice to dig these to learn what your machine is telling you.
I hope this article has given you some helpful tips and tricks if you have a multi frequency machine that can also toggle through various single frequencies.
Multi frequency machines that can do this easily are the Minelab Equinox, the Nokta Makro Legend, the XP Deus II and the Minelab Manticore. (These last two machine require a bit more toggling!)
The Minelab Equinox 800
The ultimate and original multi frequency machine that has opened up a whole new world in detecting technology.
Deep detection and constant stable target identification.