Metal detecting techniques
Using good metal detecting techniques can have massive benefits. These can include making your time more efficient, making your detecting day easier and also increasing your finds rate.
The final benefit is maintaining and more importantly retaining any permissions you have on a landowners farm or land in general. These can be difficult to get and the easiest to lose!
Metal detecting techniques can include how you use your metal detector like sweep speed, having your coil at the correct angle and sweeping correctly in relation to the ground.
Other techniques that can help are the ‘target wiggle’ and checking targets at 90 degree angles for example. This can help in identifying targets and their locations accurately.
We will discuss a few of these techniques in this article and hopefully help you work more efficiently and increase your finds rate.
Metal detector sweep speed
The rate at which you sweep your search coil over the ground can in some cases cause you to potentially miss a target. Most newer detectors these days have quite fast recovery speeds so this can be reduced.
The recovery speed of a detector is something that you will hear discussed quite often within the detecting community amongst other detectorists.
A detectors ‘recovery speed’ is the time it takes for it to process one target and then be able to detect the next target. I’ll describe how this works in a scenario.
If you have your detector’s discrimination setting set to reject iron (which most people do), when you come across a small piece iron, the detector has to ‘process’ the iron and reject it so you don’t hear it.
If there is a good target close to that iron and you are sweeping too quickly, you could potentially pass the coil over the good target before the detector has had enough time to process the last target….iron.
I cover ‘target masking’ more fully in my article on metal detector coil types here.
The worst case scenario is that you even hear the good target! This does tend to happen with older or extremely cheap detectors nowadays. As I eluded to earlier, newer detectors are much faster.
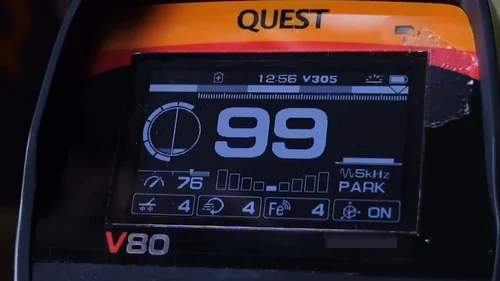
Detectors typically like the Minelab Equinox, Deus II and Nokta Makro Legend have an adjustable recovery speed setting. This setting depends on the ground conditions on the day.
A lower recovery speed setting will help with gaining more depth in cleaner soils and a higher speed setting will help in very busy conditions with iron but will reduce depth.
Higher speeds are typically used on areas that have had historic habitation on them and you need to ‘winkle’ out good targets amongst smaller iron for example.
So, sweep speed is important, especially if you have an older or budget detector. Try to slow down your sweep speed to give your detector a chance to ‘recover’.
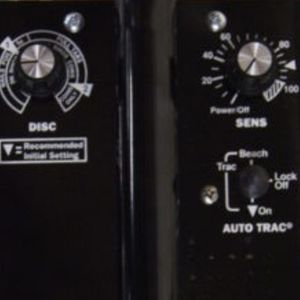
The second top tip here is to not discriminate anything and hunt in an ‘All Metal’ mode. Double check that your detector has a lower tone break for iron and a higher tone(s) for anything non-ferrous.
I have a useful article on metal detector settings here.
By hunting ‘wide open’, your detector will not have to waste time processing any rejected targets thus making it run as fast as it can. This is the way I hunt and you’ll adjust to the sounds quickly.
You’ll be sweeping along happily hearing continous low tones or ‘grunts’ for iron and then suddenly a good target will ‘pop’ out with a higher tone. It the only way to go!!
Ultimate Tactical Packs!
Carry everything you’ll need for a detecting day like a First Aid kit, detector spares, finds boxes, batteries, snacks and drinks to rehydrate.
Never forget anything again with a belt pack!
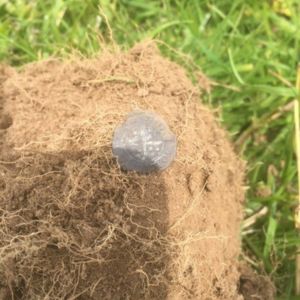
Use a pinpointer and digging tool
After you have carefully dug your main target plug, if your target is still in the hole, make sure that you use a pinpointer or ‘probe’ to accurately locate its precise position.
I have a useful article on pinpointer probes here. Once you have its position, carefully tease it out using a smaller digger tool. This is a must if you don’t want to further damage your potentially expensive find.
The digger tool allows you to expose your target with almost surgical precision. I also have another useful article on handheld digger tools here.
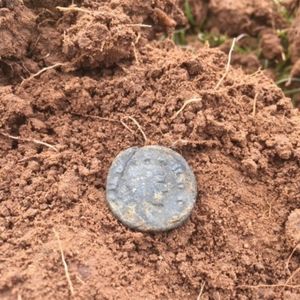
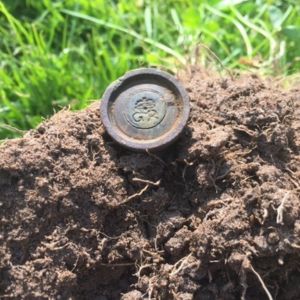
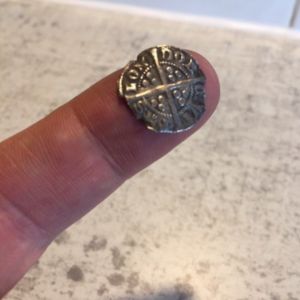
Cleaning your find
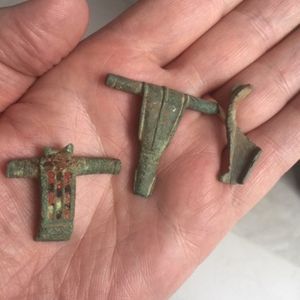
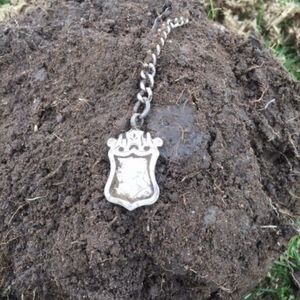
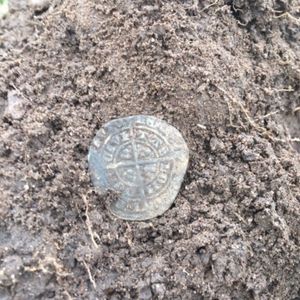
Once you have your target extracted, whether it’s an artefact or a coin, there will be that initial joy and then a temptation to rub off the mud and minute stones with your thumb and fingers!
Try to resist doing this as you might not know exactly how precious the find is yet. This could very easily produce more scratches and damage to the find.
A little trick I use is to always have a small bottle of water with a little bit of washing up liquid in and a small soft toothbrush. Using the water, detergent and toothbrush gently is much better.
You can see my setup of this under ‘tip 4’ in my article on metal detecting tips here.
Unbeatable Multi Frequency!
You can now get the ultimate power of multi frequency technology over single frequency detectors with the Minelab Vanquish range of detectors.
The entry level Vanquish 340 now gives you ultimate depth, stability and sensitivity on all target types in every soil, including wet beach sand.
Sweep overlapping
With the introduction of ‘DD’ coils, ground coverage is massively increased. It also has the bonus of deeper detection from the front to the back of the coil. I have an article on search coil basics here.
Depending on fast your pace is, combined with your sweep speed could mean that you are missing targets by ground you aren’t covering with the search coil.
By slowing your pace a little, you can ensure that you overlap your sweeps better ensuring that you cover as much ground as possible. This will help to avoid missing any target inbetween sweeps.
Search coil & ground distance
Every detector and search coil has an ultimate depth they will detect to. This depends on the detector, its settings and the search coil size.
To give yourself the biggest chance of all, the search coil must be swept as close to the ground as possible to give you maximum detection depth. An incorrectly setup shaft can shorten your detector.


Say for example that your detector will detect approximately to 10 inches in depth. If your search is 4 inches from the ground, you are only detecting to 6 inches!
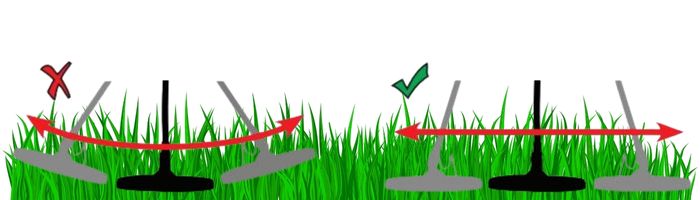
Ensure that your search coil has a coil cover or ‘skid plate’ so that it won’t get damaged. Then, make sure that you sweep as close to the ground as possible.
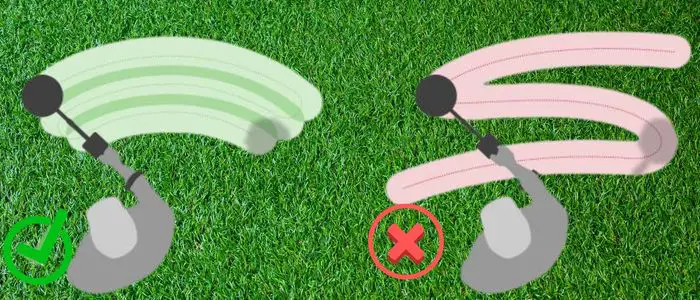
One final key tip is to watch that you don’t upturn your search coil at the end of each sweep. This again can reduce your detection depth at the sweep end. Keep it flat throughout the sweep and at the end.
Search coil angle
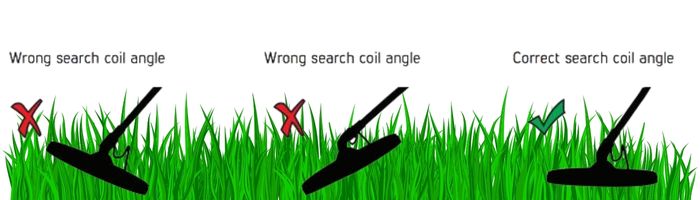
Continuing with the theme of always trying to maximise your detection depth, ensure that your coil is tightened at the correct angle, parallel to the ground.
An incorrect search coil angle on the coil bolt can also cause a constant loss in detection depth. This can be reduced or elimated by the use of a ‘coil bracket’.
This keeps the search coil at the correct angle after being nudged or knocked. You can push the tip or heel of the coil onto the ground to return it to the coil bracket.
The target wiggle
The target wiggle is nice little trick when you are trying to locate a target amongst unwanted targets. As you sweep, you get a series of low tones (typically iron) when suddenly you’ll hear the glimpse of a good target.
By shortening your sweep over the good target glimpse, you can wiggle the search coil over it to see if it repeats. You may hear both a low and high tone but you’ll know something is there in between the iron.
Your detector might fluctuate with target ID numbers but it will deperately try to give you the same non ferrous target ID number amongst the fluctuations.
Look for a number that repeatibly tries to come through amongst the fluctuations. Your detector isn’t doing anything wrong! It’s just trying to tell you that there is more than one target under the search coil.
DD coils help massively here as they project a narrow, ‘blade’ like field so massively help with target separation. This is because there is less chance of two targets being under the blade shaped magnetic field.
Checking at 90 degrees
Checking a target at a 90 degree angle is a fundamental technique in metal detecting. This is because irregular shaped iron can give you a good signal one way but a low tone at 90 degrees.
If you have a high tone in one direction and a low tone at 90 degrees, it most definately is iron. I would advise when starting out however to check this but also dig these ensure you’re correct.
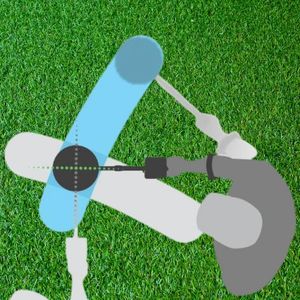
This is until you get used to what your detector is telling you. You ultimately are looking for a stable target sound in both directions and ID numbers that fluctuate only very little.
Depending on a targets depth, orientation in ground and proximity to anything else close to it, the target ID numbers can fluctuate a little.
Target tipping
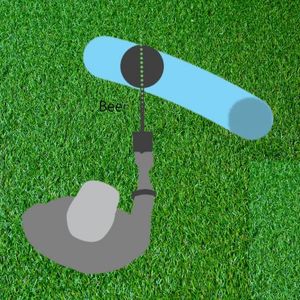
Target tipping with a DD coil is a nice little trick to precisely locate at target. When you have the target underneath the centre blade of your coil, you slowly wiggle backwards until the target disappears.
You then wiggle forwards until it reappears. You then know that the target is right under the front tip of your coil. Visually mark it and place your your spade right there!
Metal detector digging techniques
Knowing how to dig the perfect hole or ‘plug’ could be the difference between you losing a permission and retaining it. All sorts of issues can arise from incorrectly reinstated holes.
One of the most serious issues could be an injury or even a loss to livestock that have lost a footing in a sunken hole or even in one that hasn’t been backfilled at all.
Please make a promise to me that you’ll properly fill every hole you dig and treat any permissions you have with the utmost respect.
Try to keep plugs to the smallest size possible to retrieve the target. This requires you to be as accurate as you can with your pinpointing. Try using the coil tipping as described above.
Personally, I never use a pinpoint function. I always check my targets a 90 degree angles and visually take a ground reference in each plane. Where it crosses is usually spot on.
If your spade has a curved head, try to maintain keeping the plug circular. If your spade is flat, cut the plug as a three sided square leaving one side intact as a kind of ‘hinge’.
This allows or at least helps the grass to continue growing. Ensure that any loose soil is returned as well as any stones. Throwing away any stones will mean that soil has to fill the voids of where they were.
This can cause the plug to sink and create a trip hazard for livestock. Vets bills can be so much that a farmer may have destroy it. Insurance can help in these situations if it was accidently caused by you.
You can read more about this in my article on metal detecting insurance here. Finally, when all loose soil is returned and the plug replaced (grass side up!), gently apply pressure to compact it in.
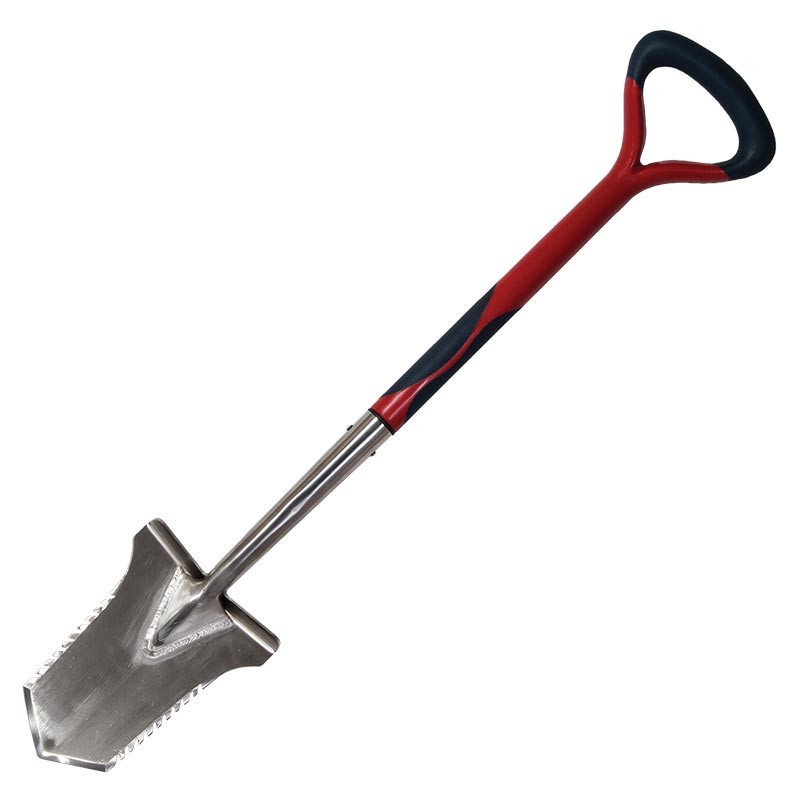
The Evolution Pro Cut
The ultimate accessary for the serious metal detectorist. Super strong, stainless steel specially designed spade.