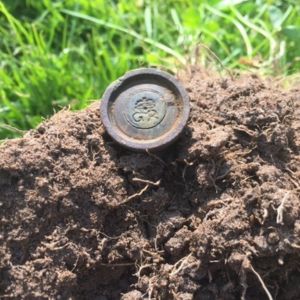
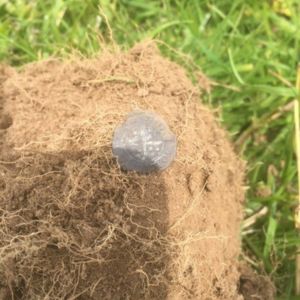
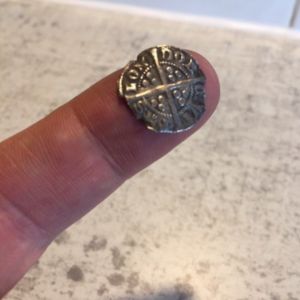
Before you undertake the idea of cleaning an old coin, caution is key! Most advice given by experts is not to do this unless you are sure the coin will not lose any value or has no intrinsic value to start with.
If the latter is the case and you wish to clean a coin to expose more detail out of interest, there are several ways to this. This fall into the bracket of mechanical, electrolytic and chemical cleaning.
How to clean a coin at home
How to clean metal detecting finds
Most books or expert information resources will almost without exception advise you not to clean a coin or artefact.
The main thing to remember here is that you could potentially have a very rare, unidentified coin that could have its condition made worse and consequently its value.
As long as you are not bothered about potentially making the coin worse, it can be very satisfying transforming a coin that has been subjected to the detrimental attrition of time in the ground.
With some knowledge of how to clean metal detecting finds, you can transform your finds into something that has some great detail and interest.
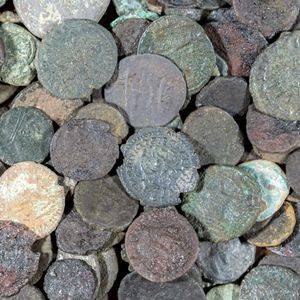
Most coins found by metal detectorists will need some degree of cleaning. If you enjoy cleaning coins, there is scope to start a hobby or cottage side hustle.
Buying a job lot of roman coins from a dealer can be a very cheap way to source your bulk coinage. The dealer just has not got enough time to clean them.
By systematically going through these coins carrying out sympathetic cleaning and conservation, you can increase their value and resell them.
Anyone that can demonstrate the patience to do this, can turn a profit.
There is also the chance that you may come across an encrusted silver coin that looks like a bronze coin until it’s cleaned!
You can read my article on Roman coins facts here and you can also read about life after the Romans with the Saxons and Vikings with their coinage in Anglo Saxons and Vikings here.
Easy way to clean coins
Coin cleaning can sometimes feel daunting without knowing where to start. In this article, I’ll try to keep things as simple as possible and where possible, explain what typical household products can be used to improve your finds.
We’ll ignore some of the more hazardous products that some sources will recommend out of the interest of Health & Safety.
It must be remembered however that you MUST be careful with household products also. It’s not purely for this exercise but a general good life skill to know.
Even mixing some standard household cleaning products can be very dangerous. You should NEVER mix anything as a rule.
Chemicals are complex things and when mixed can displace one another depending on their reactivity sometimes producing some very nasty gases!
The best way to perfect coin cleaning is to practice on coins that have no intrinsic value to them. By continued practice, you will become an expert!
Be prepared obviously for some disasters but remember, practice makes perfect.
Unbeatable Multi Frequency!
You can now get the ultimate power of multi frequency technology over single frequency detectors with the Minelab Vanquish range of detectors.
The entry level Vanquish 340 now gives you ultimate depth, stability and sensitivity on all target types in every soil, including wet beach sand.
Why do coins deteriorate?
There are several reasons why coins deteriorate in the ground and why most coins that have been in the ground for a long while will need cleaning.
It mostly is a combination of the component metals that the coin is made up from and the external conditions that the coin has been in.
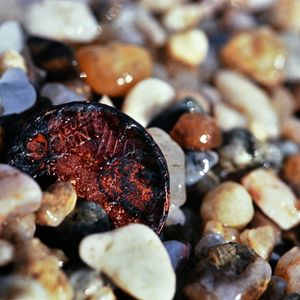
Coinage in the UK can cover a very wide time span from Saxon to Roman and from Medieval to modern day.
This means that coins can be made of pure metal or be alloyed with a mixture of metals.
These metals can include gold, silver, nickel, tin and copper for example, all in different quantities.
When metals are exposed to the elements, they all want to get broken down into their base constituents. A prime example of this is iron that will rust and gradually disappear into the ground.
Different metals do this at different rates and some are more resistant than others. Gold is the obvious choice to present at one end of the scale as in its pure form is basically inert to corrosion.
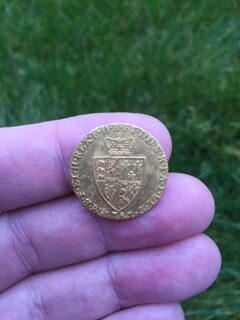
This is why if you are lucky enough to find a gold coin like I have, it sets your heart racing as it comes out of the ground in the same condition it was dropped.
A coin made with a mixture of metals can suffer from deterioration as one of it’s alloyed metals will degrade causing the coin to rot away.
The other catalyst that speeds up this process is the environment the coin has been left in.
One example may be the salty conditions of a beach that can literally destroy coins and artefacts, especially modern coinage.
The only thing that ultimately survives is gold jewellery and some silver.
Other factors that can cause alter the PH of ground conditions are chemicals from crops, fertilisers, acid rain and even livestock constantly doing their business on the ground.
This is why I always recommend wearing gloves when detecting. You can read further about this in my gloves for metal detecting article here.
Coin cleaning methods
The choice of a coin cleaning method will obviously depend on the degree of encrustation or corrosion. At it best, a coin may have suffered from uneven patination to something that is completely obscured by a crusty, rock hard formation on it.
In lighter patination situations, this can often be sorted by a simple cleaning solution and a light polish. In cases with more heavy and thicker patination, it is common practice to apply a metals salts solutions that will re-coat the coin.
This is sometimes preferred as removing the heavy patination will often reveal a very pitted surface to the coin.The initial step is to visually assess how bad the coin is and if anything needs to be removed first.
Mechanical cleaning
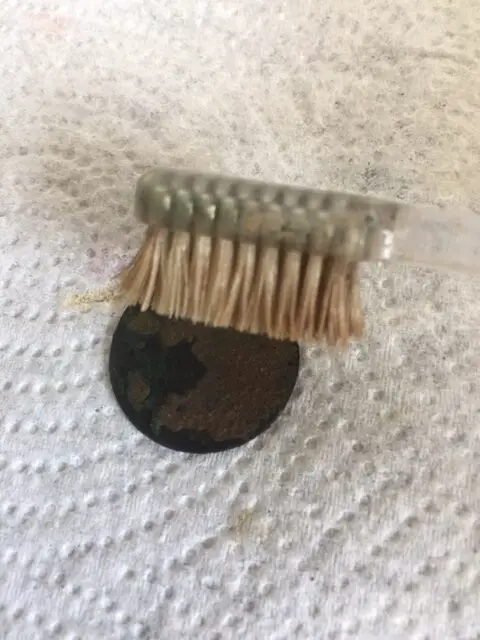
Mechanical cleaning as its name suggests involves removing surface deposits by hand.
When starting this process, it’s important to remember to start gently and gradually increase how aggressive you wish to go.
Usually, the initial process is the use of something like a tooth brush. You could even start with a soft tooth brush working up to a hard one.
Wire brushes should be a temptation best avoided. They are, or can be very harsh and can scratch the surface of a coin. Wire brushes should only really be used things like iron.
A typical example would be a really nice horse or ox shoe. Many people wire brush these and spray them with a product like Hammerite for decorative purposes.
You may also be tempted to use a small brass suede brush that you maybe have in your shoe cleaning kit. These are also best avoided as they can sometimes deposit a thin film of brass over metal.
This could potentially make your coin’s appearance look worse.
Coin cleaning pencils
Specialist glass fibre bristle brushes are very often a great investment and are used in small stubborn areas. Coin cleaning pencils are abrasive enough to loosen crud but are also sacrificial and break off.
Coin cleaning picks
Other common tools that can be used are things like a crafting scalpel for cutting away medium density crud and crust.
Another way is to use something like a wooden cocktail stick to continuously pick away at the edge of the crust gently.
Harder encrustation can be picked at with a thick sewing needle or another handy tool to have, a dental pick that a dentist would use to remove plaque.
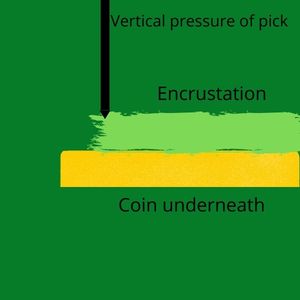
The technique is to remove any corrosion or crud by applying downward pressure to the leading edge of the crud and causing small pieces to break off a small bit at a time.
It’s important here to apply a vertical pressure and to work in from the edge of the crud. Applying any significant force at an angle and in the middle of a patch of encrustation could cause a brittle coin to crack or fracture.
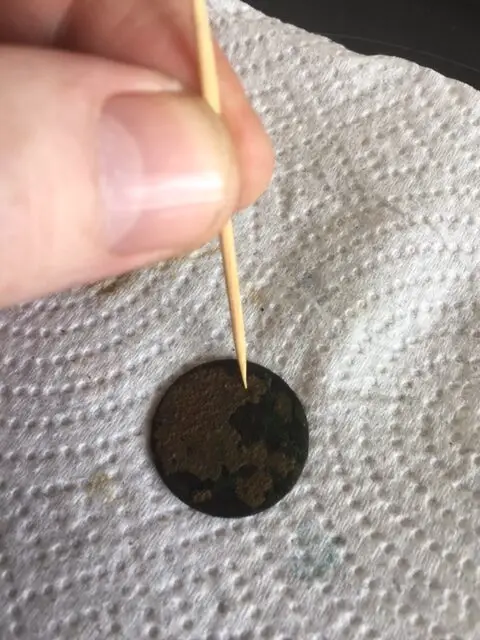
It can be a slow process but again, with patience can produce some great results. The important thing to remember is to go slow and steady, don’t rush and to enjoy the process.
Finally, a fantastic addition to your kit if you fancy doing this often is a bench or table mounted magnifying glass. Maybe even one which has a light.
This can free up both hands and allow you to see every detail you are revealing.
Finally, it is worth mentioning that if this great side hustle is something you wish to pursue, you may want to speed up the process of potentially revealing that very rare crusty roman coin!
This is by the use of an adapted engraving tool. Engraving tools are different from the hobbyist micro drills you may think of, like a “Dremel” for example.
These drills rotate where as an engraving tool vibrates. This can then replicate the downward pressure you would carry out by hand but much faster.
You can also really control the pressure so it could really speed up the process. You may just need to adapt the point of the engraver.
Barrelling machines
Barrelling machines consist of a small drum that you tip the coins in you want de-crusted and switch on so it turns and tumbles the coins thus cleaning them.
The coin versions are adapted machines that people often use for tumbling rocks or semi precious gem stones.
This method is a really harsh method of cleaning and not one I recommend. You will read some blogs out there about coin cleaning and they will shamelessly promote these barrelling machines but I wouldn’t go for one personally.
They are just way too aggressive and will destroy your coins.
Ultimate Tactical Packs!
Carry everything you’ll need for a detecting day like a First Aid kit, detector spares, finds boxes, batteries, snacks and drinks to rehydrate.
Never forget anything again with a belt pack!
Electrolytic cleaning
Coin cleaning with electrolysis
Electrolysis is a method of cleaning which is basically the opposite of electroplating. Instead of coating a metal object, the surface coating is removed by reversing the polarity.
In its most basic form, it consists of a transformer and a positive and negative electrode. (An anode and cathode)
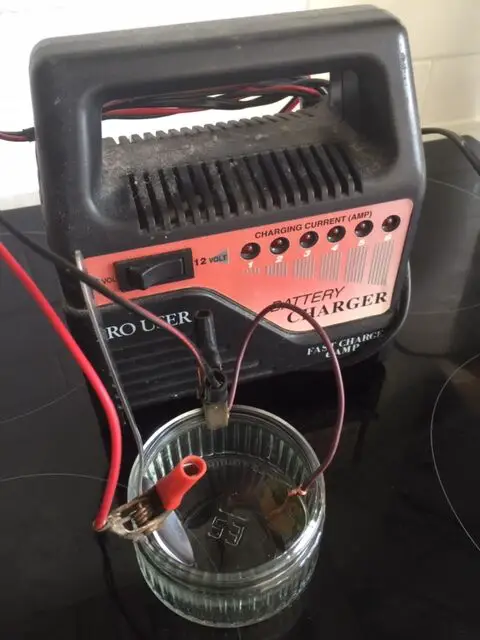
The anode end usually consists of a stainless steel bolt or even a teaspoon.
The cathode will be a small clip or a shaped copper wire to cradle the coin but also touch it.
The set up I rigged up here I did in 15 minutes with my car battery charger, a spoon and a small glass bowl.
The container for the liquid to bath the coin in will typically be made from plastic, glass or be ceramic.
The solution is called an “electrolyte” which is how the ions flow from the anode to the cathode.
This will be water plus a small amount of dissolved salt to help the process along.
You can also add a cleaning agent which typically would be caustic soda or citric acid. (like a Jif Lemon for example)
A current is then passed through the set up and after a short moment, you’ll start to see bubbling around the electrodes.
The cruddy surface of the coin will slowly start to detach from the coin and the water will start to go cloudy and dirty.
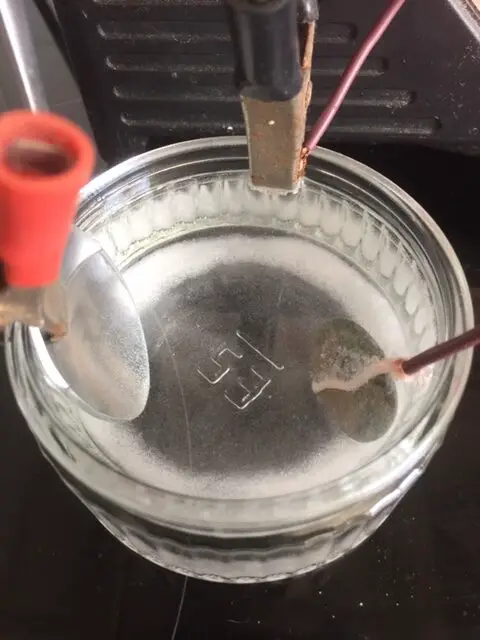
This is where you have to go careful. If left unattended, this process would eventually strip a coin down to its bare metal.
This method is often used for very short periods to loosen hardened crud and leaving it to be finished of by hand as previously talked about.
When I first started out, I made my own electrolysis set up.
To be honest, it was a bit of a faff and again, some other coin cleaning blogs will show you how rig one up with either an old phone charger and some wires with clips etc.
If you want to rig one up as a bit of fun, find an old phone charger or a battery charger charger you might have around.
If you don’t have one, you can find a cheap one on Amazon here.
You just then need to strip an old off cut of cable so you have the copper wire inside. This gets shaped into the coin cradle. You just finally need an old tea spoon you won’t mind destroying.
Clip the spoon to the red Anode and one side of the container. Clip the copper wire cradle to the black Cathode and the other side of the container.
Place the coin in the cradle and fill up the container as described above with your water, salt and cleaning agent. Switch it on and watch the magic happen.
Watch the first one carefully and keep switching it on and off to check the coins progress.
Chemical cleaning
Chemical cleaning involves soaking a cruddy coin in a liquid that’s either acidic or alkali. I have done this many times by soaking a coin in something like a small egg cup. So what can you you use?
Let’s take a look at some household items that you may have in your kitchen that are acidic. This process does take a long time so you tend to do it and then just leave it a kitchen window sill for several days.
How to clean dirty coins with vinegar
The first you most likely have is vinegar which is obviously acidic. Place the coin in an egg cup and cover it with the vinegar. I tend to use white vinegar as brown vinegar can some cause staining but I don’t think it’s a massive issue.
The acidic nature of the vinegar over time will soak into the crud and cause it to loosen. It can then after several days be picked off using the hand methods as we’ve spoken about.
Coin cleaning in Olive oil
Similar to the process above, soaking a cruddy coin in olive oil will do the same thing. The olive oil will soak into the crud and loosen it over time for later hand removal.
One trick here is to not use the Extra Virgin or Virgin olive oil varieties.
When olives are pressed and processed to gain the oil, acidity is removed in the Extra Virgin and Virgin presses. Acidity is what we’re after so go for the cheapest olive oil you can find.
This will be the most acidic. Check in the coin every few days and pick at it to see if anything has softened.
How to clean coins with Coke
This method can work in a lot of cases. It will need to be the full sugar variety Coke. Soak a coin in the for 5 minutes at a time and check it.
The constituents of the Coke should remove the tarnish from the coin. This can be quite aggressive so keep an eye on it.
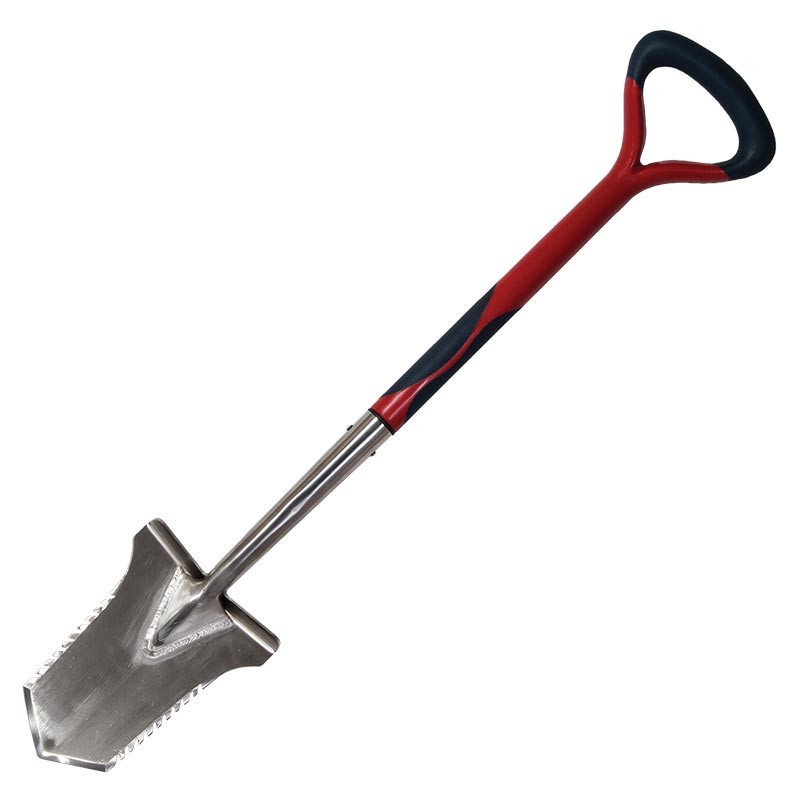
The Evolution Pro Cut
The ultimate accessary for the serious metal detectorist. Super strong, stainless steel specially designed spade.
Cleaning gold coins
It’s very rare that pure gold is used for jewellery or coinage. Gold in its pure nature is very soft so is alloyed with either silver or copper.
This gives it hardness to cope with everyday wear and tear but retains its gold colour.

In its pure form, gold is completely resistant to any corrosion. Even when it’s alloyed as described above, it largely remains unaffected by corrosion. Pure gold is described as being 24 carat.
Therefore, 18 carat 18 out of 24 parts pure and 9 carat is 9 parts from 24 parts pure.
Due to it’s nature, if you find gold, the most you’ll need to do is to wash it off in warm water with a small soft tooth brush.
Remember, older gold can develop a lovely orange hue which can be lost if cleaned with any proprietary products.
Cleaning silver coins
Silver is generally a bit tougher and harder than gold. It is also more susceptible to corrosion. As gold is alloyed, so is silver and is usually alloyed with copper.
When the alloying is 50% or above, it is often termed as “billion”. Most modern silver these days is 92.5% silver or 925 parts out of 1000 parts.
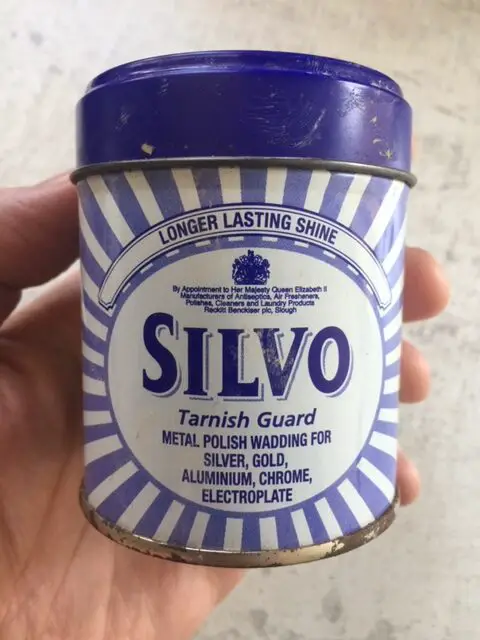
The most common forms of corrosion found on silver is “silver sulphide” which is that familiar black tarnish you have probably seen along with copper carbonate.
The copper carbonate sometimes leaches out from the base metal and forms a familiar green deposit seen by detectorists.
Silver coins tend to be more valuable when having a small amount of “toning” or slight dulling rather than being bright and shiny.
The Silvo silver cleaner in the photo is great for removing black toning very gently.
Copper carbonate can be removed by a 5% solution of either citric or sulphuric acid but you need to determine of it’s there because the silver coin has been debased so much with copper that the coin is effectively only silver coated.
(I have a roman denarius like this I found a while back!) If it is, immersing it in the solution will ruin it.
So, if we’re talking about silver coins, you’ll want to keep some minimal toning on the coin to save its value. Light toning can be removed by typically using Silver Dip.
Another method I have used many times, mostly on any silver hammered coins I’ve found is aluminium foil. Cut up enough of a small square to be able to wrap around the coin flat.
You can read my article on medieval hammered British coins here.
Ensure the coin is on the inside of the foil. Now…..spit on both sides of the coin before you wrap it. The enzymes in your saliva will speed up the process.
Rub the wrapped coin gently between your fingers and thumb. You should notice it getting warm or even hot. The foil will start to remove the black toning.
If it’s working, you’ll also notice an eggy smell from the sulphur dioxide. Dry off in some kitchen roll. If you want to be a little more aggressive, a small amount of abrasive scouring cream between your fingers and thumb and very gently rub…..very gently!
Wash off under warm water.
Best way to clean copper coins
Copper coins are the “bread & butter” finds for most detectorists. Chances are we’ll dig these up everytime we go out!
Copper has been used for coinage for thousands of years either in its natural form or commonly alloyed with other metals. When tin is added to copper, it’s known as bronze.
If the tin content happens to be very high, it can be called “Potin”. Similarly, when zinc is alloyed with copper, it’s known as brass. Other alloys form gun metal and Britannia metal.
In the majority of cases, copper coins will be unearthed and have a green patina or discolouration to them which is copper carbonate.
With the amount of variations copper can be alloyed with however, the types of corrosion can sometimes be quite complex.
It must be remembered however that a old or ancient coin that has developed a smooth green patina is far more collectable than one that has been brightly cleaned so be aware!
You won’t find a collector interested in an ancient coin that’s been polished to death. In general, most, if not all copper or copper alloyed coins will need to be cleaned mechanically.
Electrolysis or chemical cleaning will almost always reveal severe pitting making the coin look worse. You are far better off picking away at any encrustation as we discussed earlier.
A little trick of rubbing the coin with a hard ink eraser can loosen surface material and reveal some detail.
Final thoughts
Okay, we have covered lots today. In brief, we’ve established that sometimes it best not to clean a coin at all, just to wash it off.
If you do want to clean it, you can do it mechanically, chemically or with electrolysis. When finished, you’ll want to show them off. Why not read my article on metal detecting finds cases.
Once you know how to clean metal detecting finds, coin and artefact cleaning is a really nice side hobby to have and can be profitable if you have the time.
If you want to find out more about detecting, you can read my article metal detecting for beginners here and also my article on discussing is metal detecting worth it here.

