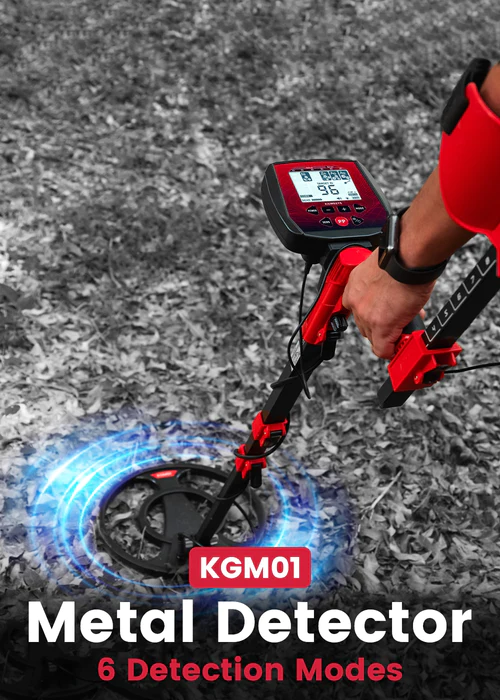
The Kaiweets KGM01 – A new entry level offering!
When a lovely lady called Jane from Kaiweets contacted me to ask if I’d be up for writing a review and field testing their new KGM01 metal detector for them , I jumped at the chance of course!
I started metal detecting more than 20 years ago and have now finally retired my trusty Minelab Equinox 800 for a Minelab Manticore.
I did start off however with a very humble CScope VLFTR770D.
The detector was very much analogue and as I remember had a very erratic needle dial that seemed to go wherever it wanted!
That was a long time ago now and things have very much moved on.
I was really eager to see how the relationship between cost and technology has changed since then. Back then, technology was expensive however you can now get great technology at much lower cost.
Read my full review here and also check out the unique discount code I have secured with Jane at Kaiweets for anyone wanting to break into the hobby with a great beginners metal detector.
Use DMD15 at the Kaiweets website checkout here for an extra 15% off!
Use Promo Code: 89GDVFNS here for an extra 10% off at the Amazon checkout!
Who are Kaiweets?
Kaiweets are a group of young engineers that all passionately shared the same interest in producing affordable and superior quality electrical testing tools and DIY accessories.
During this collaboration, they decided to travel the world, including the U.S., Europe, the U.K, and Asia, searching for reliable electrical testing tools and DIY accessories that were affordable, smarter, eco-friendly, and easy to use.
In their quest however, they discovered that it was no easy task. For that reason, they created Kaiweets in 2018 to solve this.
They soon became a game-changer by providing young families and engineers with high quality electrical testing tools at an affordable price.
After successfully producing precision testing equipment, they utilised their skills and knowledge to venture into the world of metal detecting.
They proudly have produced their first metal detector, the KGM01.
They take pride in exceptional customer service and most importantly, 100% customer satisfaction. All of Kaiweet’s equipment undergo rigorous testing to ensure quality is met.
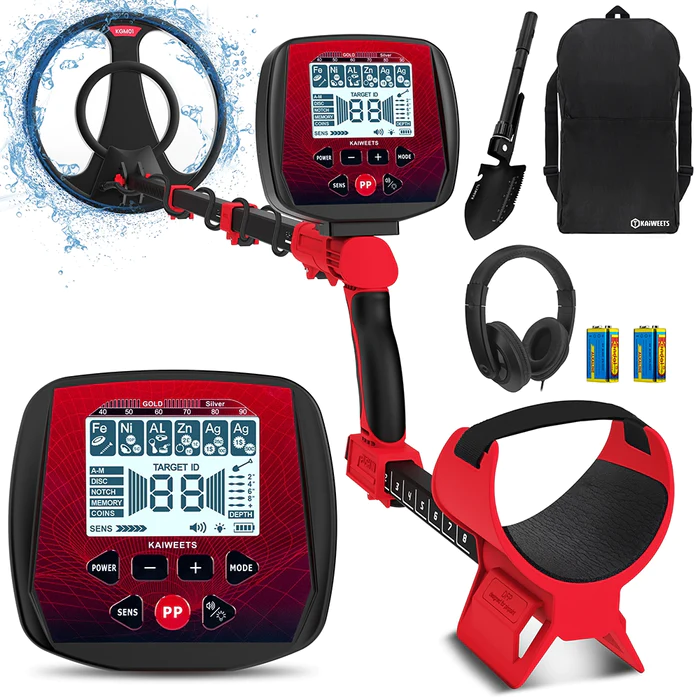
Kaiweets KGM01 key features
Detecting modes
6 Detection Modes: The KGM01 has 6 pre-programmed detect modes that allow you to choose how you want to hunt.
All metal mode: As it suggests, in this mode, all metals, including iron can be detected. Beginners often think, “why would I want to detect all metal?”. Well, too long for this article but there are benefits.
By not rejecting iron or other items in fact, it can reduce processing time and speed up the recovery speed of a detector. The different pitched tones help you discriminate which is what the KGM01 does.
Disc mode: This allows you to gradually increase (or decrease) your discrimination sequentially using the “+” and “-” keys beginning at iron and becoming more aggressive to reject unwanted metal targets.
Notch mode: This mode allows you customize the removal of unwanted metal targets. By using the “+” or “-” keys, it scrolls through the metal icons and rejects certain metals inbetween accepting others.
When you reach the icon you wish to ignore, leave it to flash and then disappear. This can be useful for rejecting certain things like foil or pulltabs. (Remember, rejecting these can mean missing good targets however!)
Memory mode: This mode is quite useful if you want to detect a particular metal target like a pound coin for example. When in this mode, sweep over your desired target, eg. a pound coin.
The detected coin will appear in its corresponding detection icon and then the other icons will disappear allowing you to only detect pound coins or other targets that fall within that icons range.
Coins mode: As it suggests, this increases discrimination so only coins will be detected. This rejects iron and foil typically and is useful for high traffic areas like parks or dry sand beaches.
Pinpoint mode: This mode is very useful for accurately locating a target after it’s been detected. Enter this mode by using the red “PP” button.
As the tone loudness and pitch increase to their maximum, the target is located in centre of the coil.
Other key features
Fully adjustable shaft: The KGM01 has a fully adjustable shaft from 29-44 inches so no matter what height the user, finding the optimum shaft height is easy. It’s incredibly sturdy with robust cam locks.
Ground balancing: The KGM01 metal detector is equipped with a fixed ground balance for normal ground conditions which can help eliminate the impact of mild ground mineralization.
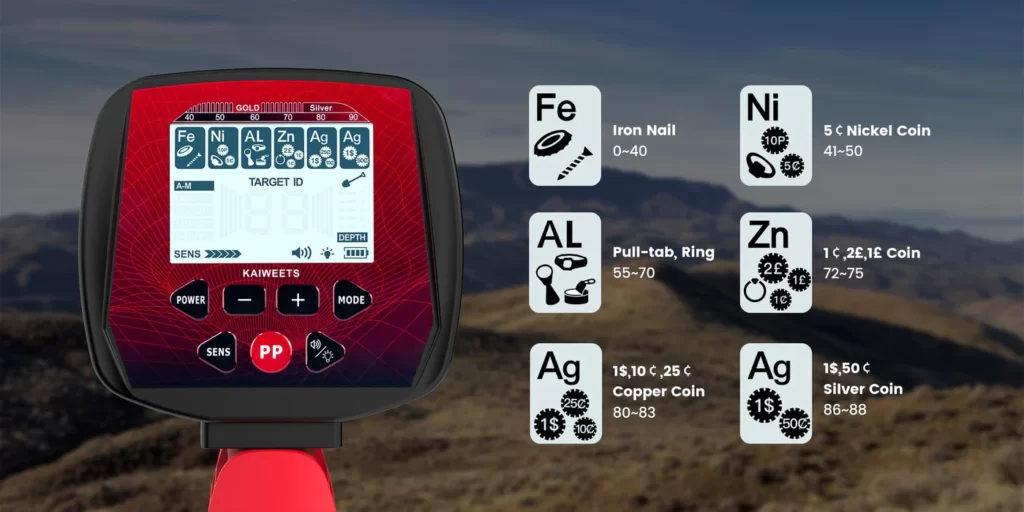
Intuitive LCD Display: The user friendly display has been specifically developed and designed for beginners. The backlight function enables easy use in low light conditions.
Three display modes to easily identify types of detected metal and display as conductivity scale digital numbers, an icon image and also sound.
It is just a matter of time and getting out there to get used to the ID scale numbers in relation to the every day targets you’ll find. Testing targets on the ground is a great way to practice.
The control screen also displays target depth, sensitivity level, your operating mode and battery strength. A really nice touch is that Kaiweets have designed the icons for the US and the UK.
The icon symbols display Cents, Dollars, Pence and Pounds. It’s these little touches that prove Kaiweets have really put that little extra thought into their first detector.
Search Coil
The KGM01 metal detector features an IP68 waterproof concentric search coil measuring just under 300mm (11.5″).
This is exceptional for an entry level machine. Normally they are much smaller. Typically 9 inches.
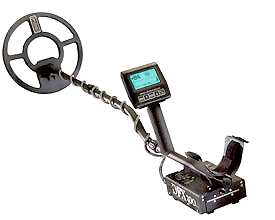
The last time I saw a concentric coil this size was on the high end level Whites DFX300 at the time.
The general rule is that the bigger the coil, the deeper it will detect and more ground it will cover.
For further reading on these related topics, read my articles Metal detector depth – How deep do you need? and also Metal detector coil types – Explained!
Kaiweets KGM01 – First impressions
When I received my parcel from Jane at Kaiweets, I was very eager to get it open and see what the boffins at Kaiweets had produced for the £120 price point.
Inside the neat and very compact box was the search coil, the shaft components, the control box, a handy backpack to store it in, a folding pick type digger, 2 PP3 9v batteries, a pair of headphones and the user manual.
Assembling the KGM01 was a breeze but then I am a construction site manager and a seasoned detectorist.
It really is simple but there are assembly instructions in the user manual. I have to admit, for £120 I didn’t expect much.
I feel guilty for thinking that now! Once assembled, I found the KGM01 absolutely rock solid and purposeful in the way it felt.
I was blown away with the quality. It feels like a detector that should have a much higher price point.
Sweeping the machine from left to right felt confident. There was absolutely no movement in the shaft at all. The inclusion of the velcro arm strap in the arm cup is also a nice touch.
This locked my arm firmly in the detector making it feel like an extension to my arm and very comfortable. The larger a coil on a detector can make it feel heavy and unbalanced.
This is the trade off with having extra depth and covering more ground. Okay, the KGM01 isn’t the lightest of machines but that is because of it’s robust build strength and big coil.
The inclusion of the headphones and batteries is a nice touch as this means that you can get out straight away! The backpack is also thoughtful but I probably wouldn’t use it if I’m honest.
Finally, the included folding digging tool is also very thoughtful but in reality, it won’t get used. It maybe is useful in scooping sand from a hole on the beach but not inland.
A more useful item would of been a “Lesche” type digging tool in a belt hung sheath. I have an article on Metal digging tools here.
Even though the search coil is waterproof, it must be remembered that the control box isn’t. If you plan to go out when it’s raining, popping a small plastic bag over it with an elastic band is an idea.
There are several benefits to detecting when the ground is wet. You can read more about this in my article Can you metal detect in the rain.
Having in-built rechargeable batteries, auto ground balancing and bluetooth headphones would of been a distinct advantage but the price point would of increased much more.
By only having a wired headphone option and removeable batteries, Kaiweets have focused on performance and build quality whilst keeping the price point low for the user which is not a bad thing.
The do supply a set of headphones and also some batteries to get you started so they have thought about it which is a nice touch. Investing in some rechargeable Lithium ion PP3’s is a good idea.
From my initial field testing, the headphones are great for the included price and sit very comfortably.
The air test
Unfortuneately, the weather was against me when I received the KGM01 so I decided to add another section where I carried out some air tests on some of my finds collection.
The conductive scale on the KGM01 goes from 0 to 99 with icons as shown below.
My typical finds air tested with these numbers.
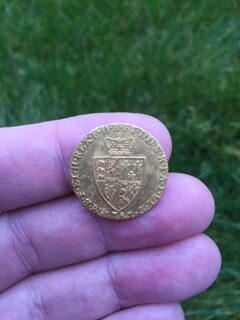
| George III 1797 22ct gold full spade guinnea | 66-67 |
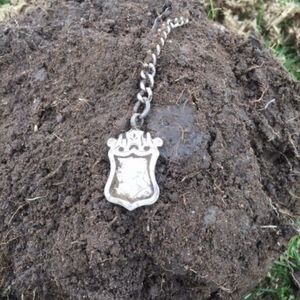
| Lead bag seal | 66 |
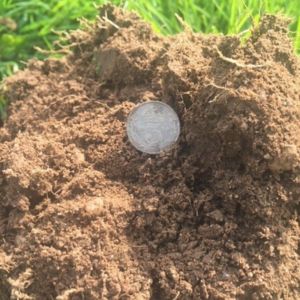
| George V 1921 silver half crown | 80-81 |
| George VI 1936 silver florin | 76-77 |
| George III 1819 bullhead silver shilling | 80 |
| George III 1816 bullhead silver sixpence | 72 |
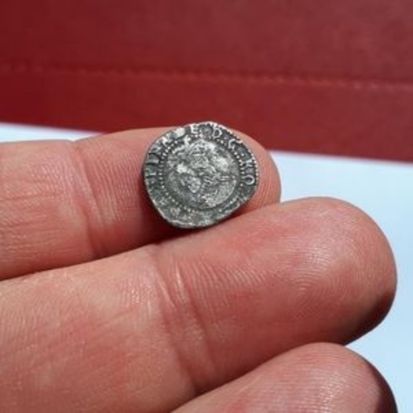
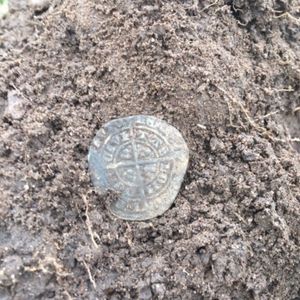
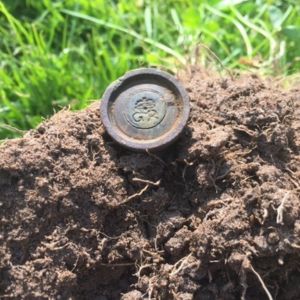
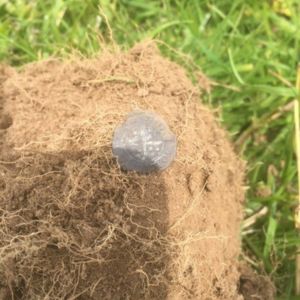
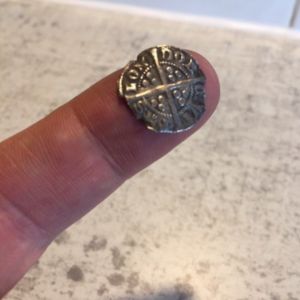
| Elizabeth I 1592 large silver hammered | 68 |
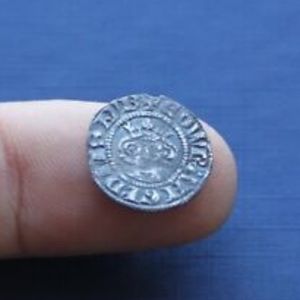
| King John 1199-1216 silver hammered penny | 57-58 |
| Henry III 1216-1292 silver hammered penny | 02 |
| George III Cartwheel copper penny | 76 |
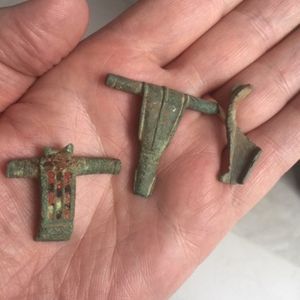
| Bronze/Copper alloy buckle 1700’s | 68 |
| Bronze/Copper alloy buckle 1700’s | 65 |
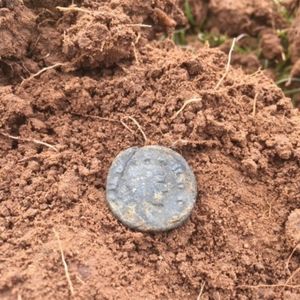
| Roman fibula brooch | 40 |
| Roman bow brooch | 53 |
| Copper alloy Naval button | 61-63 |
| Copper alloy trade weight | 65-66 |
| Military general service button | 61 |
My initial conclusions on the KGM01 whilst air testing are this. You will need to increase the sensitivity as high as it will go whilst remaining stable. You will also have to slow your sweep speed right down.
This is how I plan to use the KGM01 in the field. You must remember that this is a £120 metal detector, not a £1200 metal detector. You must give it a chance and it will find targets.
The final thing to remember is that the low tone covers the target ID numbers 0-54 which is iron up to Nickel based small coins.
Now, if you plan on just having fun and doing some “coin shooting”, I would use DISC mode, ignore the Iron icon and sweep slowly.
If you want to find smaller, thinner type hammered coins, typically in a farmers field, you’ll want to use All Metal mode and dig everything that gives you a tone.
Small, thin silver hammered coins do come in very low on the conductive scale and are notoriously difficult to detect, even for much more expensive metal detectors.
For further reading on this subject, check out article Hammered British coins – The elusive targets.
The field test
I am currently field testing the Kaiweets KGM01 and will be posting an in the field video very shortly!
Kaiweets KGM01 – Conclusion
When Jane from Kaiweets and I initially communicated about field testing the KGM01, I’ll be absolutely honest, I initially said that I wouldn’t do it. I thought it wouldn’t be up to much at its price point.
After that, I thought about it some more and contacted Jane again to say that if I did this, it would be an honest review that was constructive. I was so glad that changed I mind.
Despite my initial fears that it wouldn’t be up to much, I found the KGM01 easy to use, robust with good depth and it looks great too!
The LCD display was easy read and the audio signals were clear and distinctive. I always hunt in All Metal mode and discriminate with tones.
One thing to remember, the KGM01 has a battery saving shut down timer. Keep an eye on the screen as it may shut down whilst you are detecting. You just need to power it back on as it saves your settings.
If you don’t notice, you’ll be detecting with the machine powered down.
Three available tones on the KGM01 is perfect for this. You get a low, medium and high tone depending on the conductivity or the target.
Typically high for copper or silver, medium for buttons or buckles and low for iron or gold. You can read more about metal detector discrimination and metal conductivity here.
Okay, it’s not the lightest machine out there but it feels like it could withstand a lot of punishment. The build quality for the price point is amazing.
It must be remembered however that the KGM01 is a £120 metal detector, as is it’s main competitors below. You must sweep slowly and methodically and give it a chance. It will find you good targets.
The Kaiweets KGM01’s main competitors at this entry level price bracket in my mind are the Minelab Go Find 11 or 22, the Nokta 1st Swing and the Nokta Mini Hoard.
The KGM01 blows all of these out of water! The next serious contender is the Quest X5 but is priced around £170 so quite a bit more expensive.
If you are looking to venture into metal detecting without breaking bank, I cannot recommend enough the Kaiweets KGM01. You will not be disappointed for a sub £130 machine.
Don’t forget to use the discount code DMD15 will get you an extra 15% off at the Kaiweets checkout.
Check out the Kaiweets KGM01 over at Kaiweets here.
or
Use Promo Code: 89GDVFNS here for an extra 10% off the Kaiweets KGM01 at the Amazon checkout.
You may even find something that might change your life!